DIYP reviews the Saramonic MixMic powered XLR microphone adapter
Jun 27, 2017
John Aldred
John Aldred is a photographer with over 20 years of experience in the portrait and commercial worlds. He is based in Scotland and has been an early adopter – and occasional beta tester – of almost every digital imaging technology in that time. As well as his creative visual work, John uses 3D printing, electronics and programming to create his own photography and filmmaking tools and consults for a number of brands across the industry.
Share:
DIYP reviews the Saramonic MixMic powered XLR microphone adapter
Jun 27, 2017
John Aldred
John Aldred is a photographer with over 20 years of experience in the portrait and commercial worlds. He is based in Scotland and has been an early adopter – and occasional beta tester – of almost every digital imaging technology in that time. As well as his creative visual work, John uses 3D printing, electronics and programming to create his own photography and filmmaking tools and consults for a number of brands across the industry.
Share on:

Switching from the built in microphone to one that sits on top of the camera is the first step in getting quality sound. Whether it’s your primary audio source or simply offers a clearer track for syncing in post, external mics are the way to go. They help to eliminate handling noise and are often directional to help reduce random sound coming from your environment.
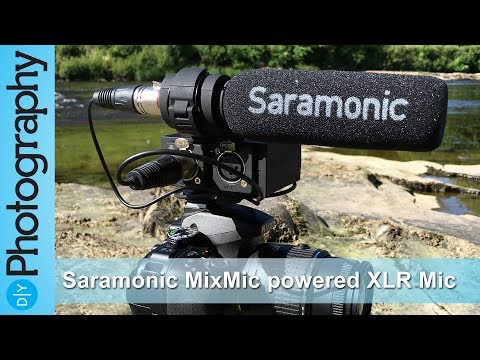
The Saramonic MixMic is one such system. Although designed primarily to be used as a on-camera microphone, it offers a lot of versatility. It’s comprised of two main parts. The MixMic XLR Adapter itself, and the Saramonic NV5 microphone. And you can add a second microphone if you wish. It offers features that you can grow into and expand upon as your abilities and needs increase.
First let’s look at the different types of on-camera microphones that are typically available to us.
Powered vs Unpowered Microphones
When it comes to the powered vs unpowered debate, both choices have their advantages. There’s generally three variations on these setups. There’s basic unpowered microphones, all-in-one powered microphones, and powered systems which sit between the camera and separate microphone. The last variety is where the Saramonic MixMic fits.
Unpowered microphones are often the cheapest and lightest. They have a simpler overall design with fewer components. Something like the Rode VideoMicro is excellent for what it costs. And is a great way to get started with external audio. But they have their limitations. Their output signal isn’t very strong, so you have to keep the record levels in the camera quite high. This can produce a lot of hiss due to the crappy preamps often found inside cameras.
Then you’ve got the all-in-one powered microphones like the Rode VideoMic Pro. A substantial leap in quality, but also a substantial leap in price. These are also fairly lightweight, as they’re designed to be so, although heavier than unpowered microphones. These supply a much stronger signal to the camera, so you can keep your record levels lower, reducing the background hiss.
The modular powered systems like the Saramonic MixMic win out when it comes to versatility. The MixMic in particular contains a pair of XLR audio inputs, with independent controls for each. This means you can use pretty much any XLR microphone you wish. So, you can adjust and adapt to your needs at the time.

If you’re using it with a microphone on-camera to get a clean track to sync in post, you can use a short shotgun mic, like the supplied NV5. If it’s going to become your main audio for something more dramatic, you might go for a boomed shotgun mic on a long cable. Or, you could plug in a large diaphragm cardioid condenser studio mic like the Rode NT1a for doing spoken pieces to camera. You can even take a feed straight from a mixing desk for recording live music and events.
First impressions
Upon taking it out of the box, I was quite surprised by how light it felt for what it was. Of course, the microphone itself wasn’t attached to the XLR adapter. There was also no battery was inside it. But even once assembled, it isn’t too heavy. 227g plus a PP3 9 volt battery. It’s a little heavier than one might like for something like handheld vlogging, but certainly light enough for a camera’s hotshoe to handle. For comparison, a Nikon SB-900 speedlight weighs around 415g, not including batteries.
The NV5 microphone itself is rather nice. It feels good and solid and has a nice weight to it for its size. It’s a couple of inches shorter than my Rode NTG1, although the sound is quite comparable. Assembling everything together and plugging in the wires was straightforward. The switches are all clearly labelled so you can quickly tell what they all do.
There’s also another cold shoe mount on top of the unit. If you’re recording yourself, this allows you to place a small light on top. You don’t get a massive amount of clearance on the side, though. So, while I’ve had no problem with my Aputure Halo, it might not fit something like the Aputure AL-M9. Although you could always use a miniature ball head to raise the light above the microphone mount.
My only immediate concern was how flimsy the XLR cable feels that comes supplied with the MixMic. XLR cables seems to be a recurring issue with Saramonic products. I had to buy a 3rd party cable for the UwMic9, too. The one that comes with the MixMic is very thin, and it’s also plastic coated. So, it probably wouldn’t stand up to much punishment with regular use.

I purchased a short 3rd party XLR cable that was substantially more durable with a silicone coating. Although I did use the original Saramonic XLR cable for my tests in the video above. When comparing the two side-by-side, there wasn’t any real noticeable difference in sound quality between the two cables. But the replacement cable should last much longer.
First Use
One thing you’ll quickly discover about this unit is how important it is to use with a camera that shows audio levels. As there’s no level indicator on the unit itself, and no headphone socket. I originally tested it with a Nikon D7000 body, which doesn’t show audio levels on the LCD. I was constantly either clipping the sound or far too quiet. On trying it with my Nikon D5300 and Nikon D800 bodies it was a different matter entirely. Now I was able to see the background audio level as well as my voice.

Even with a camera that has level meters, though, it’s not completely foolproof. It is possible to send a clipped signal to your camera, even with the camera’s record level set low. If your camera happens to contain a headphone output, then it’s fairly easy to resolve. If it does not, you’ll want to test in advance to find what you’re happy with.
With tests done and everything dialled in, though, operation was a breeze. The switches and dials were straightforward to decipher. After a few quick test clips with various settings, I was able to find a combination that gave me decent enough results. I was getting a good strong signal with a low record level on the camera to minimise preamp noise.
The MixMic Unit Itself
As mentioned, the unit itself feels fairly solid, with clearly defined labels for all the options. There’s no intricate push button LCD menu systems, just an array of physical switches and dials.

It will work equally as well with an unpowered XLR microphone like the the Rode Reporter, or microphones that require 48v phantom power. As well as the supplied microphone, I also tried it out with the Rode NTG1, Rode NT1a, and Sennheiser K6/ME66. All combinations worked perfectly.
I also briefly tested it in combination with the Saramonic UwMic9 dual wireless lavalier kit. Although the UwMic9 receiver can plug straight into a DSLR, the signal isn’t very strong. Putting the MixMic in between the UwMic9 receiver and my camera allowed me to boost the signal, reducing preamp hiss. This is ideal when you’re doing an interview and your camera’s locked off on a tripod.
The Supplied NV5 Microphone
The Saramonic NV5 microphone that comes with the MixMic doesn’t seem to be available to purchase separately. Although I kind of wish it was. It’s actually a pretty impressive microphone for its size. It comfortable compares to something like the Rode NTG1. In fact, with both microphones plugged straight into my Tascam DR-100 recorder the two are are surprisingly, almost indistinguishable.

I don’t have any real issues with the microphone itself, just the foam cover. Even though foam covers aren’t really designed to deal with a lot of wind, many of them do fairly well. The foam cover on my Rode NTG1, for example, handles it fairly well, as do the foam covers on my lav mics. The one that comes with the MixMic, though, isn’t quite so effective. But, as a pop filter, it works beautifully.
Saramonic do actually make a furry windshield for the NV5. So, if you’re planning to shoot regularly outdoors, it’s definitely worth picking one of these up. It would be nice to see this included in the box, though, even if were to increase the unit price a little.
Note: It turns out, after doing some googling, that there is supposed to be a furry windshield included with the MixMic. This is great news, although there wasn’t one in my box. So, if you order one, check that it’s in there when it arrives. And make sure to use it if you’re outdoors!
Other than that, I have no complaints about this microphone whatsoever. I certainly wouldn’t hesitate to get it off the camera and boom it over a subject’s head, as I do with my other shotgun mics.
Pros
There’s a lot of things I like about this unit. I feel the benefits it offers are definitely worth the purchase price.
- You can use it with just about any microphone you wish (although the supplied NV5 is rather good)
- Good strong output signal to minimise camera preamp hiss
- Independently control phantom power & levels to both microphones separately
- Virtually no handling noise from the camera passed to the microphone
- Mono and stereo output
- Great battery life
Cons
I normally complain a lot about products and their shortcomings, but my list for the MixMic is surprisingly short.
- The supplied XLR cable is a little weak
- No headphone jack
Other stuff
- Not a deal breaker, but an indicator on the front to let you or your talent know that it’s turned on would be nice
- The foam cover doesn’t do so well in the wind (there’s supposed to be a deadcat included, but it wasn’t in my box)
Overall thoughts
As a vlogging microphone, it’s not going to be ideal for everybody. If you vlog with your camera on a tripod indoors, then it’ll be perfect. The weight and wind issues won’t matter. You’ll get amazing quality sound that you’ll be able to use straight out of the camera with little or no processing. Perhaps, maybe, a hard limiter and a normalise.
If you’re outdoors, though, walking around with the camera while speaking to it, you might run into trouble. If you resolve the wind issue with a deadcat, you’re adding even more weight. The MixMic & microphone is 221g. Add a PP3 battery, and you’re adding around another 45g. The deadcat windshield probably adds about another 50g or so. So, you’re somewhere around 315g. That’s a lot of extra weight to keep held up all day. Especially if you’re already holding a 500g camera and 200g lens. But, whether that weight is really an issue or not will depend on you and what you’re comfortable with.

Outside of vlogging purposes, there’s really not many caveats. Again, if you’re out on location, you’ll probably want to pick up a deadcat. But when you’re filming other people, rather than yourself, it’s easier to deal with the weight. Even handheld. If you’re using a shoulder rig, or a monopod, then doing interviews at events and such, it’s great as your main audio source. And you can always plug a handheld mic into the second XLR socket as a backup.
You could use it as your main audio source for seated interviews, too. Boomed shotgun mics with long XLR cables going into the MixMic on the camera is a good option if you don’t want to record separately and sync in post. But do remember to tape those cables down so nobody trips over them. Or you can combine it with something like the UwMic9 and go wireless.

If you’re doing a more scripted production with multiple cameras, and you just want clean sound for syncing, it’ll work perfectly for that, too. It’ll help to pick out your talent’s voice while eliminating much of the environment. Or, as with interviews, you can go wireless with lav mics, or boomed shotguns.
For the price, this kind of versatility can’t really be beat. I believe every DSLR or mirrorless video shooter should have an XLR adapter in their kit bag. I find them invaluable. They help to offer DSLR and mirrorless video shooters the type of in-camera audio features that dedicated video cameras have had for years. The Saramonic MixMic is definitely one of the better options I’ve tried.
The Saramonic MixMic is available to buy now.
- Saramonic MixMic – $219.95
- Furry Windshield for the NV5 – $29.95
The MixMic does a very nice job of overcoming Nikon’s crappy preamps as the main audio track. Those crappy preamps were the main reason to make Nikon the choice for these tests. That being said, I’ll probably use this mostly to capture clean audio for syncing when shooting multiple cameras. I wouldn’t hesitate to use it as my main audio if it were my only option, though.

John Aldred
John Aldred is a photographer with over 20 years of experience in the portrait and commercial worlds. He is based in Scotland and has been an early adopter – and occasional beta tester – of almost every digital imaging technology in that time. As well as his creative visual work, John uses 3D printing, electronics and programming to create his own photography and filmmaking tools and consults for a number of brands across the industry.


Join the Discussion
DIYP Comment Policy
Be nice, be on-topic, no personal information or flames.